Showing posts with label tutorial. Show all posts

Sunday, November 20, 2011

How to Create a Custom Shadowbox: Holiday Style (and GIVEAWAY)


Well, due to unexpected drama, this post took a wee bit longer than anticipated to get up. But trust me, it's worth it. And yes, it's photo heavy so buckle up, grab a coffee, and get ready for some holiday shadowbox goodness.

Once again, many thanks to the fine folks at Elmer's for sending me some goodies and inspiring me to make such a fun and personal project.

How to Make a Custom Shadowbox
  also known as How to make your own Advent Calendar Shadowbox
      additionally known as How to make Your Own Custom Printer's Tray

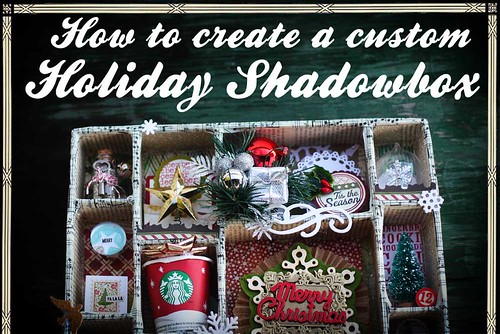
Yes, that's right. I'm making just a plain old 12 compartment open-faced shadowbox, but you could totally adapt this to make it a little deeper and put in little paper drawers for an advent thing, or make it shallower and have it look like a printer's tray. Totally up to you.

Here's what you will need:
First, you'll need to decide how big you want your finished box to be. I decided to keep the back the same width as the original board, so I would only need to trim down the sides and then add a "top" and "bottom" of the box frame.

 
I took the tri-fold foam board (looks like this: |_| when you put the "arms" at a 90 degree angle) and trimmed the two "arms" so that they were about 3.5 gridblocks wide.  I then trimmed the "back" and the arms vertically so that the whole thing was about 13.5 inches long.

I used the leftover trim from the "arms" to cut a "top" and a "bottom" for the box. I trimmed them so they fit on the "inside" of the main foam board piece.

Once you've got the pieces cut for the box, use the clear packing tape on the sides and back (the flat side) to hold all three pieces together snugly. Make sure your walls are straight and at a 90-degree angle (you know, like a normal box).

I used a few of my holiday knickknacks to help me determine how deep the project "walls" were going to be. Fortunately, the foam board had some grid lines, which really helped me to keep things straight.
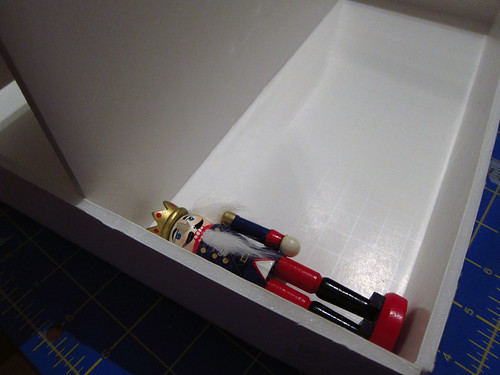

Start putting in your goodies (or use other projects found online) to plan where your compartments are going to go. I started putting in some vertical wall to help me get a sense of where everything would fit.

For the sake of structural integrity, I decided to have vertical walls that ran the length of the box and that way I could individually reinforce the horizontal pieces that things would "sit" on for each box.  Here was my first attempt at placement.
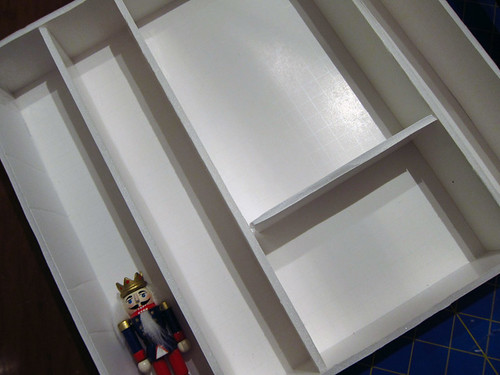
I took the walls out a few times to play with proportion and placement.
And here's what it looks like with the mostly final compartment configuration in place.

Once I found a configuration I was happy with, I got out my trusty glue gun and got to work. I took a photo to reference the placement of the compartments and used a pencil to mark where the sections were on the inside of the box. I then took everything out of the box and started gluing all around the inside corners to reinforce what the clear packing tape had done on the outside. Then I glued in the large vertical pieces. Finally, I glued in the little shelves. I glued every single join in each compartment separately. I glued especially heavy on the underneath side (to ensure that the shelves wouldn't sag later on).
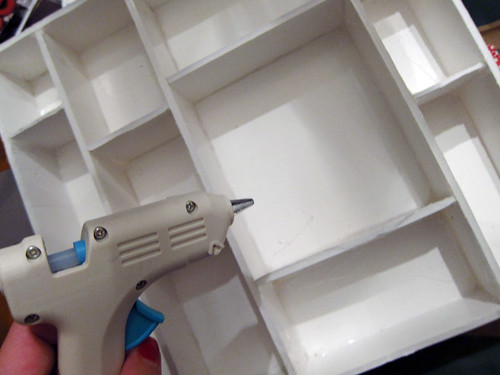

If you were going to spraypaing this bad boy, now would be the time. Since I knew I would be covering up the whole thing with paint and tape, I didn't bother with any painting.

I covered the back wall of each compartment with paper scraps from my-almost-finished 2010 December Daily. Papers include things from the Basic Grey Jovial line, some American Crafts and a stamped background using a stamp from Purple Onion (designed by the lovely Steph)

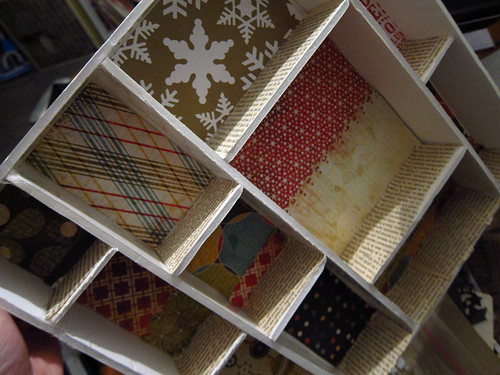
I then covered all four of the inside compartment edges with some paper from an old french book I've used for collage work in the past. I purposefully placed the text at different orientations for visual interest. Also, I did this while watching episodes of Grimm and Once Upon a Time on hulu. It was quite enjoyable.


I covered the sides and the back edges of the box with the vintage book papers as well. A single piece of (slightly antiqued) patterened paper was glued to the back.
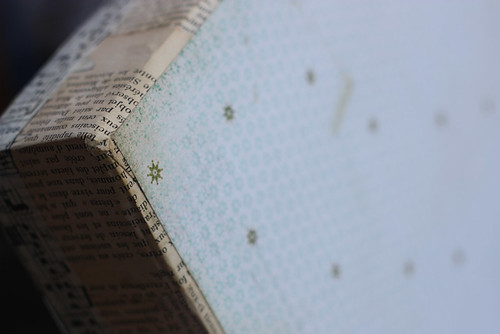

I used tissue tape to cover up the edges of the papers and to help reinforce the joins on the boxes. Again, to help things look nice, I started by taping up the horizontal shelves, then did the long vertical walls, and finally, the outside edges all got covered.

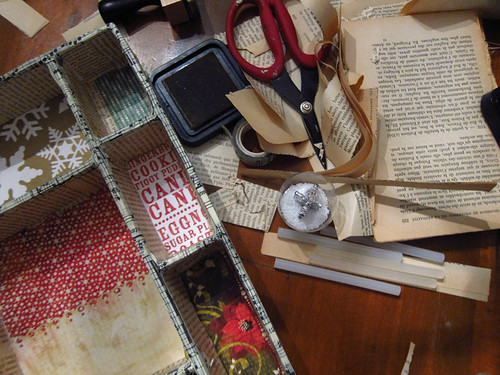
I ran some more Antique Linen distress ink over the tissue tape to help age it a bit. And here's what my table started to look like....

And then it was time to glue on the feet! I got out the glue gun and wiggled them into place.
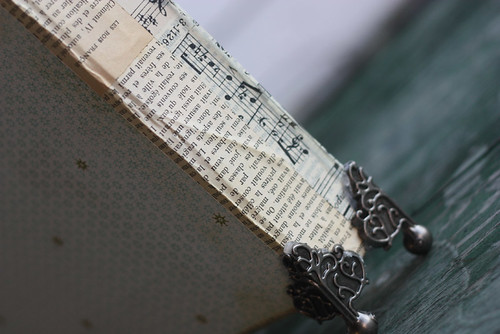

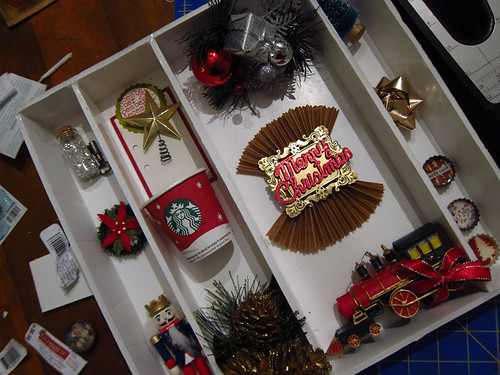
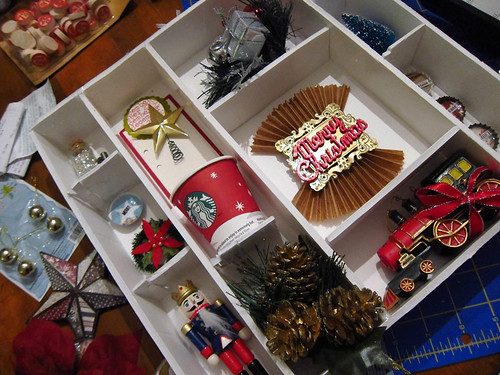
Then you start gluing all your goodies into place. I used extra bits of the foam board to make my own foam dimensional adhesive squares (aka pop dots). Here's a shot of the fully assembled box:

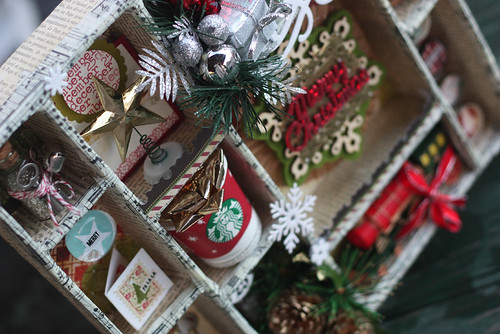
But wait, there's more. Every one of these twelve compartments has an item(s) that is meaningful to me in terms of things I love about the holidays. Let's go into detail, shall we?

Box Number One: Glass Glitter phial with key and jingle bell
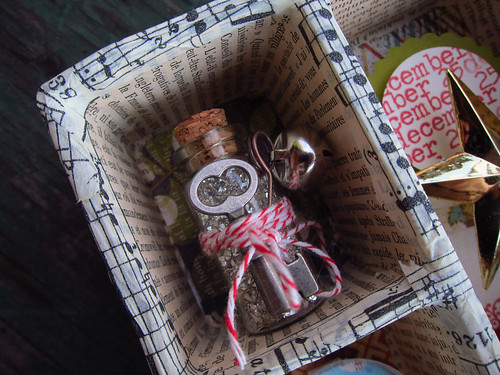
I am not a glitter girl. I don't like it normally... but when it comes to the holidays I'm all about the shine of vintage glass. I love those old mercury glass ornaments. I love tinsel and sparkle. Red twine is also one of my favorite things to use. I like to use it on tags and presents. And who doesn't love jingle bells?

Box Number Two: Glass Bubble Magnet and Teeny Christmas Card
This box is one that represents good crafty times. The first time I ever sold at a real life craft bazaar, I sold bubble magnets and holiday cards. The post for that is over here, if you'd like to see it. And the tutorial for the bubble magnets is over here. The gold dove represents peace and good luck. Because man, do I need some of those.

Box Number Three: Nutcracker and Wreath
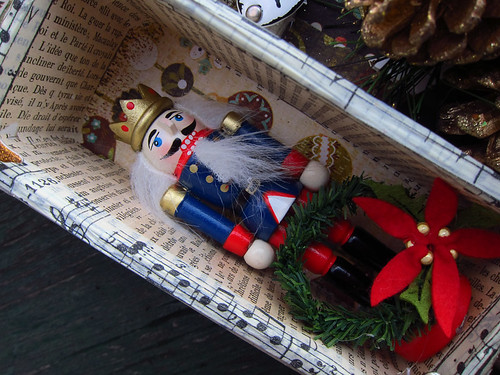
I used to love watching the Nutcracker Ballet movie during the holidays as a child. I think they are a quintessential part of any holiday decor scheme; over the years I've received several as gifts and I think they're great. The wreath is in there because at one point, we decided to stop having a tree (roommates, no space, etc), but I needed SOME kind of greenery in the house, so I began a tradition of having a wall of wreaths instead.

Box Number Four: Star Tree Topper and Stamped Tag
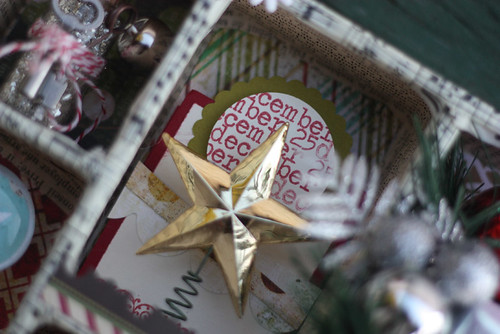
I love a good star tree topper. and thought this tiny one was a perfect representation of the one I've had on my big trees in the past. The tag in the back was actually from a make and take at a CKC Seattle a few years ago. Another fine holiday tradition (stamping and making stuff during the holidays, yay!)

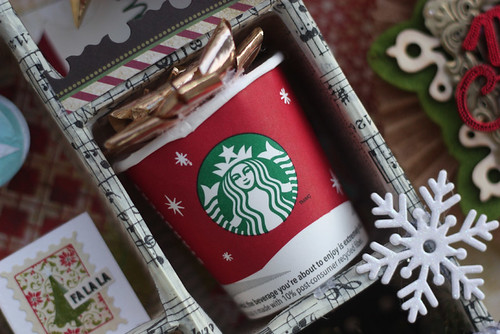
Box Number Five: The Red Cup and Bow
Ah, the red cup. Gingerbread lattes at Starbucks are a must have. I also love the little Starbucks ornaments. I have a whole little tree of them that I put up at work every year (it's not weird, because I work for Starbucks, right?). The gold bow is from a present I got last year. It's been recycled a few times (because that's how my peeps roll). In past years, whenever you got a present with a bow like this, you had to put it on your head and looking like a silly bow head was totally cool. Happy memories indeed.

Box Number Six: Boughs, Pinecones and Twenty-Five Sign
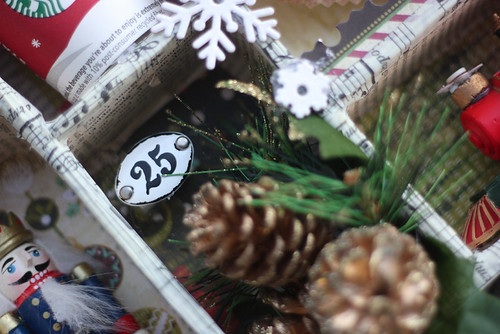
This represents the tradition of having a tree and the twenty five is of course, for December 25th. I found this little greenery sprig in the craft section at M's. And that glitter went everywhere.


Box Seven: Presents and Tag
The presents and ornaments again are great reminders of how much I love giving and getting gifts. And also appreciate tree trimming activities. True fact: at one point I could sing all of Oh Tannebaum in German. (I can no longer remember this due to lack of use in my old age, but still, a good memory.) And that tag? That's one I made this year as part of a feature for the blog (that's right, I'm getting all proactive. Hah!)

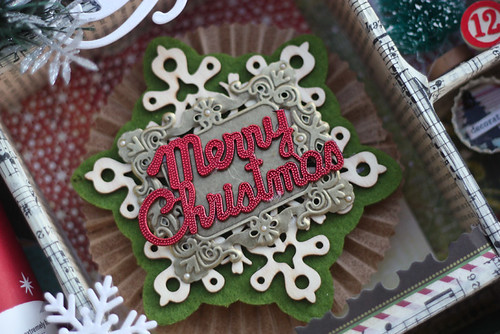
Box Eight: Merry Christmas Rosette

Ah, the centerpiece. I knew I needed something big and showy, and this little rosette fit the bill. It reminds me of my favorite holiday movie A Christmas Story. I took some Glassine paper and folded it up in to a rosette, then layered with an ornament from Target, a Making Memories metal frame and this lovely red Christmas sign ornament. (Reminds me a bit of the one I used in my "snowglobe" tutorial)

Box Nine: Holiday Train
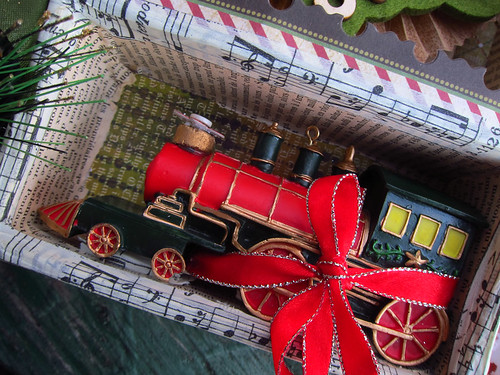
One of my happiest memories as a child was watching my grandparents (and later parents) set up and run a HO model train set around the bottom of the tree every year. It was pretty freaking magical. I could watch that train for what seemed like hours. Through the snowy villages delivering tiny presents to tiny people. Sigh. Also, Polar Express (the book, NOT the movie) was such a great part of my childhood. :)

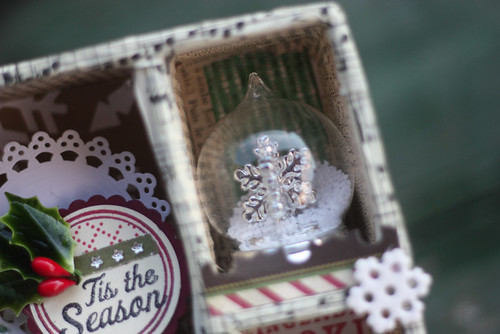
Box Ten: Mini Snowglobe
Greg likes to tease me and call me "first snowflake freakout lady" due to the fact that I may have issues with driving in the snow (due to a traumatic experience where my car went sideways down 6th avenue on year), but I really do like snowdays. Especially when I don't have to go into work and can stay home.

Box Eleven: Tiny Tree and Bingo Circle
I love me some bottlebrush trees. Especially when they are bleached white (tutorial for that is over here). I really like the classic green look here though.

Box Twelve: Holiday Bottlecap Magnets
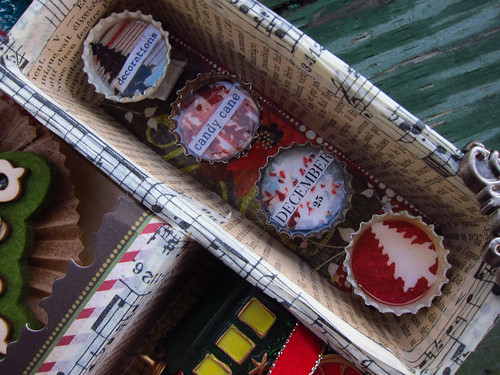

Ah, my number one tutorial. Thank you for being so fun to make and for bringing so many nice folks to the blog. I love you, tiny holiday bottlecaps. Even though I hate my lack of photography skill on that post.

And that's it for this project! Here's the whole thing again:
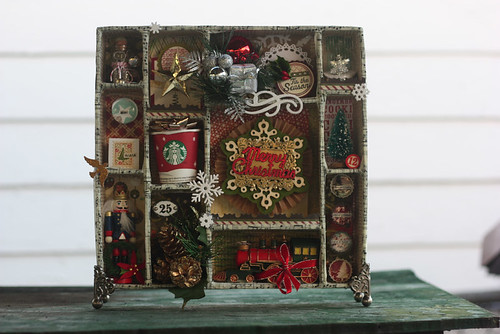
Hope you had fun reading this GIANT post! If you end up making something inspired by this project, I'd love to see it.

***************************
GIVEAWAY DETAILS!
The lovely folks at Elmer's are giving away a second prize pack, the same as in the previous giveaway. Leave me a comment telling me which of the compartments was your favorite by end of day Tuesday and I'll pick a winner.

Monday, September 12, 2011

How to: Use a Heat Tool to Cut a Stencil


Recently, I acquired a new tool from Michaels. It is the Martha Stewart Crafts Multipurpose Heat Tool. And it's pretty great.

It looks like this in the packaging:

Ostensibly, you get this multipurpose tool in order to do fancy things for home decor projects (as it's part of the new Plaid MS Crafts paint line). But it had the magic words on the box: stencil cutting.

Um, hello. I like me some stencils. Also it has a cool craft iron-y thing for laser transfers and a pointy thing for drawing on leather and such.

It does not have a knife, as this tool from Walnut Hollow does (video per Scraptime). However, I found that the tiny pointy ends in the box still worked quite well, even for details.

I made a video about it that shows you how I made my own stencils using some acetate packaging. Please excuse the rambling and bad camera work. I'm learning as I go. :)


How To: use a heat tool to cut stencils from christinaclouse on Vimeo.

Chevron stencil was inspired by Julie Fei Fan Balzer, in this post.

Also, bonus for stencil lovers, she's doing a free class called Stencil 101 and it's rad. Check out her blog here for more details.

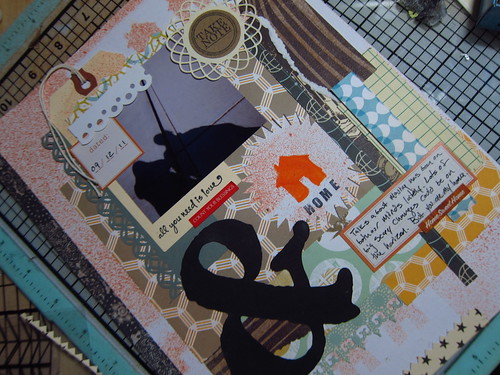
And this is a layout I literally threw together from scraps on my desk, using one of the misted papers from the video:

You can almost see the tiny misted houses.
(Yes, I'm still working on my white space issues.)

So to recap:

Pros:

  • Multiple tool tips in one tool
  • Cord has on/off switch
  • Has handy storage case

Cons:

  • Does not come with replacement tips, not sure where to buy them
  • Does not have a knife blade
  • Provided stand is sort of flimsy.
  • Really really hurts when you burn yourself

Hope you enjoyed the how to and the tutorial.

More to come. :)

Wednesday, August 17, 2011

TTV Overlay Tutorial - Video Screencast

Just a little something I whipped up as a demo for a bigger little something I'm putting together for my 10 Reasons Class site. Warning, there is some music here (just in case you are reading this on the DL).


Music credits to Good Old Neon

What do you think? Not so bad for a first try, eh?

If you have questions, I'd be delighted to hear them. Or rather, read them.

The TTV image shown is used with permission from a private Flickr group. More information on Faux TTV images is available here. And here are all my real TTV photos, if you want to get caught up.

Also, don't have photoshop? Well, I guess you might have to go take some real TTV images then. Just kidding. I've heard Splashup is a pretty fair alternative, though I haven't tried it myself very extensively.


Also, can I just say, how excited I am by all my blog loving peeps? Your support is amazing. Incredible. You make me want to make stuff just for you. Smooches.

Ahem. Thank you!

Saturday, July 16, 2011

a crafty summer

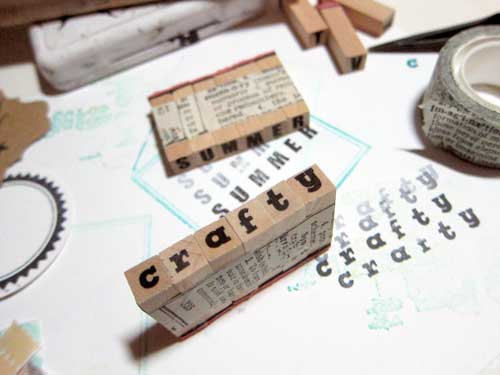
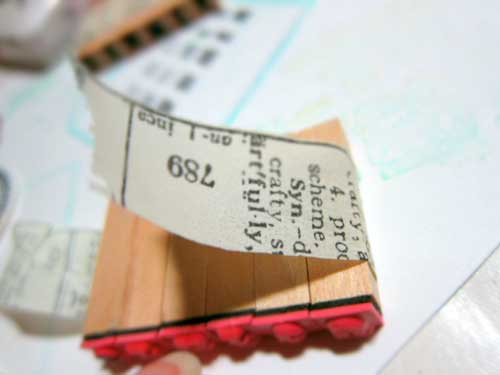
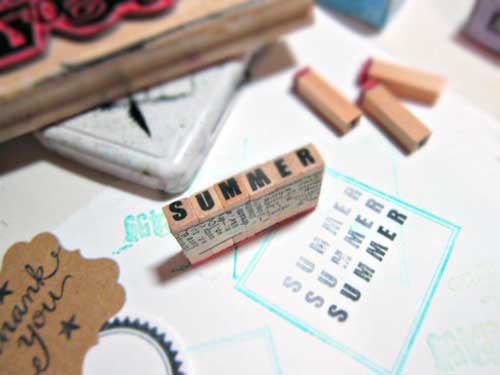
You know how sometimes you just get to playing around with stamping, especially with those dollar alphabet stamps...


and then you have an idea, like taping them together to make stamping easier? Yeah, that totally happened to me the other night. ;)


The reason that the tissue tape works so well is that it is completely repositionable and doesn't leave any residue. Hurray!


So while this is great for a temporary situation where you want to keep your alphabet intact, can you magine what would happen if you were to say, glue those blocks together? They are only dollar stamps, after all...

Happy Saturday!

Sunday, April 11, 2010

Mini Banner tutorial (plus giveaway)

So I've finally decided to jump in with the whole banner "trend."

While I did like the banner stickers that Jenni Bowlin put out at CHA, and there have been some really cute patterned papers with banners on them, I really liked the idea of being able to make my own banners out of paper of my choosing.

But how should I go about doing this?

Sure, I could cut those cute little triangles with scissors, but the combination of my imperfect cutting skills combined with the need for speed (and my current obsession with punches) made me want to search for a punch solution.

Although I do have a triangular border punch, the triangles were a little too fat for the banners that I envisioned. I wanted some more skinny (narrow) triangles.

And I have seen some diamond shaped punches out there, but never in the small size that I wanted. Also, a diamond punch not as versatile as say, a circle punch. I mean, argyle patterns are cool, but not my usual style, and also how many diamond shaped journaling blocks have you seen? Exactly.

(No offense to anyone who really likes the idea of a diamond shaped journaling block. I just mean that I don't think my pages are cool enough to pull that kind of thing off.) ;)

But then it hit me that I already had some punches that were perfect for the job: my EK Success pointy heart punches!


I love me some pointy bottom hearts. So to make a triangle punched piece out of a heart, you just gotta take some paper, and punch out your hearts...

Then snip. Off goes the top of the heart!

You get some pretty cute triangles and some little bumpy scallops.

So now you just take your perfectly punched triangles and voila! Perfectly punched banner ready to go. (I also have a pointy-heart stamp which might do to make a stamped or embossed version)

I adhered my triangles to my page in a vaguely semi-circular fashion, and drew the "string" using a black pen. I've seen fancier versions that use real stitching or baker's twine though. I guess it depends on the look you want to go for.

So that's the latest tutorial showcasing my current obsession with punches. Hope you like it.

Oh, and as an extra-special treat, I'm doing a surprise giveaway.

A brand new limited edition Studio Calico Cherry stamp set:

It's just perfect for all those girly spring projects you're working on right now. So, if you'd like a chance to win this little cutie, just leave me a comment on this post and tell me what's inspiring you right now. Comments will be closed at 5:00 pm PST on Friday 04/16/2010.

I've got quite a few things to blog about later this week, including some big personal news and the full layout you see a snippet of above.

That's it for me for tonight. Hope your weekend was fantastic. Happy Sunday!

Saturday, March 27, 2010

EK Success Photo Labels Punch Border Tutorial

(Sorry for the super long post title, but it seemed appropriate).

Even since CHA, I have been eagerly been awaiting the opportunity to purchase several of the new EK Success Slimline punches. Fortunately, when I went to my local JoAnn's on Thursday, I was delighted to find a bunch of the new punches had finally come out.

I picked up a few of the ones I couldn't live without and got my craft on. I have a couple of future posts planned around some nifty uses for them.. but for today, my favorite of these new ones has to be the Photo Label punch. It is a large size slimline punch that will punch out three individual labels at once. I believe the individual label sizes are large (2.25"L x 1"H)  medium (1 3/4"L x 7/16"H) small (1"L x 7/16"H). 

The one downside of the punch is that I like my labels to have a slight border around the edge. I tried inking the edges, but apparently, my shaking hands just aren't cut out to do that without causing smudges. Ditto for trying to turn them into a frame and using one on top of another. I also dug through my stash of label stamps, but found nothing that would fit the dimensions of my punched labels.

So, time to do this the hard way by making a border for the label by matting it on cardstock (you could use any paper, really).
You are going to need the photo labels punch, some sharp detail scissors (here I used my Cutterbees), and some hole punches. For the large label, a 1/4 inch hole punch, and for the smaller labels, a 1/16 inch hole punch (these are Fiskars). You will also need some paper.

Go ahead and punch out some labels. Here I used white and kraft as my base.
Once you've got the desired amount of labels punched, adhere them to your base cardstock.
I like to trim my paper down a bit once I've got the label adhered. Once you've got your pieces ready, grab your hole punches.
The easiest way to deal with the little corner indents is to use your hole punch to neatly trim the cardstock to the desired edge width. Use the 1/4 inch punch on the big label, and the 1/16 punch on the smaller labels.
(You could also stop right here and with a few less cuts, make yourself some faux tickets, if you wanted.)

I like to punch all the holes first, that way if I mess up, I can reposition the label on the cardstock. Once you've got all the corners done, trim the rest of the cardstock to the desired border width.
Once you've got everything trimmed to size you should have a nice little stack of labels and scraps. Feel free to recycle your scraps (but definitely hang on to your labels).
If you like, take a moment to admire your pretty new labels. You could even go on to mat the label again, either with the same paper as the main label, or another contrasting color. Lots of possibilities.
Fun right? And here's a little sample of some labels I placed on a scrapbook page I'm working on. Ooooh. Good stuff.

Hope you liked my little tutorial. If you liked this one, you can also check out my other free tutorials here.

Have a great weekend and happy crafting!

Blog Widget by LinkWithin